Pantry Organization on a Budget
Pantry organization on a budget: measure your shelves, set up zones, reuse jars and boxes, add risers and simple labels, and keep a small kitchen cabinet tidy.
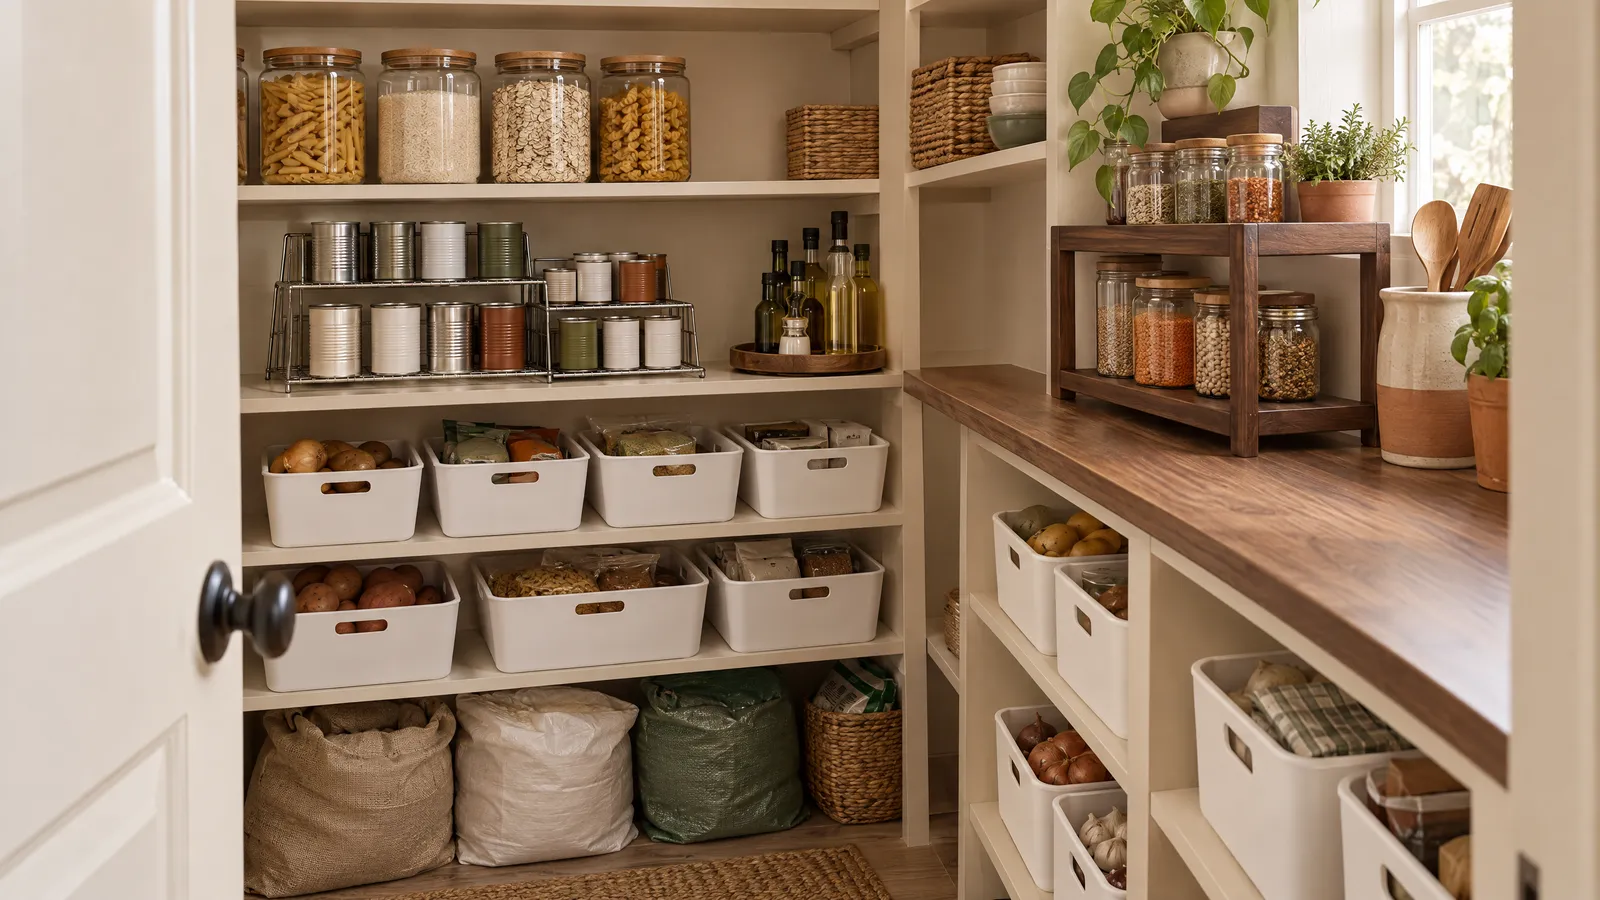
Before you start
A pantry gets messy for two reasons: food has no fixed home, and deep shelves hide whatever sits at the back. You fix both by giving each type of food a zone and making the back of every shelf easy to reach. Matching canisters are optional. Measuring isn’t.
Most pantries and kitchen cabinets fall into a few sizes. Reach-in pantry shelves are usually 12 to 16 inches (30 to 41 cm) deep, upper kitchen cabinets about 12 inches deep (a little less inside), and lower cabinets about 24 inches (61 cm). The gap between shelves is often 12 to 16 inches. A standard 15-ounce can is about 4.5 inches (11 cm) tall and 3 inches (8 cm) across, so any shelf with 12 or more inches of headroom has room for a riser.
What you need
Most of this you may already have:
- A tape measure, a marker and masking tape or blank labels
- Clean glass jars with lids, saved from sauces, pickles and jam
- Shoeboxes or cut-down cereal boxes to test bin sizes
- A few plastic bins with handles for deep shelves
- One or two shelf risers, and a turntable for a corner
- A tension rod for standing trays and baking sheets on edge
Step by step
-
Empty it and check dates. Take everything out, one shelf at a time if the kitchen is tiny. Toss anything past its date or stale, and put aside unopened food you won’t use for a food bank. Wipe the shelves. If you find webbing or small larvae in grains or flour, throw out the affected packages, vacuum the corners and wipe the shelves before anything goes back.
-
Measure every shelf. Write down the width, depth and clear height of each shelf. Every container you buy later should divide evenly into those numbers. For example, a 16-inch-deep shelf takes one 15-inch bin or two 7-inch rows.
-
Sort into categories. Group like with like on the counter: breakfast, baking, pasta and grains, cans, sauces and oils, snacks, spices, and backups. Seeing the piles tells you how much space each group really needs.
-
Assign zones by how often you use them. Daily items go between about waist and shoulder height, roughly 30 to 60 inches (76 to 152 cm) from the floor. Heavy things, such as bulk bags, bottled drinks and potatoes, go on the floor or the lowest shelf. Backups and once-a-month items go on top. If kids help themselves to snacks, give them a bin on a low shelf.
-
Use bins as drawers on deep shelves. One category per bin, with the bin about as deep as the shelf, so you pull the whole thing forward instead of digging. Test with shoeboxes or a cereal box cut down on a slant before you spend anything. When you do buy, plastic bins with handles wipe clean and slide easily; our guide to plastic organizer boxes covers sizes and lids.
-
Add height where shelves are tall. A stepped riser lifts back rows of cans so you can read the labels. A wire shelf insert splits a tall shelf into two, with mugs or jars below and boxes above. A turntable of 9 to 12 inches (23 to 30 cm) across works in corners for oils and sauces. Our guide to storage shelf organizers covers risers and inserts.
-
Decant only what earns it. Move food into containers only if you use it often or pests like it: flour, sugar, rice, oats and pasta. Reused jars are free and airtight if the lids still seal; wash and dry them completely first. Cut the best-by date and cooking instructions off the bag and tape them to the back of the container.
-
Label shelves and bins. Masking tape and a marker cost almost nothing and are easy to change. Label the shelf edge as well as the bin, so food goes back where it belongs and anyone in the house can find it.
-
Keep it moving. When you unpack groceries, put new items behind older ones so the oldest gets used first. Keep a “use first” bin at eye level for opened packets and anything close to its date, and do a five-minute tidy when you write the shopping list.
A simple shelf-by-shelf plan
For a typical reach-in pantry with four or five shelves, this layout puts the right things within reach:
- Top shelf: backups, paper goods, party supplies and small appliances you use a few times a year, in bins with handles you can pull down.
- Eye level: breakfast, snacks, coffee and tea, and the pasta and rice you cook every week.
- Middle: cans on a riser, sauces, oils and vinegars on a turntable, and baking supplies in one bin.
- Low shelf: heavy jars, bottled drinks and bulk bags.
- Floor: potatoes and onions in separate open baskets for airflow, a step stool, and anything too heavy to lift above knee height.
Cheap swaps that work
| Instead of buying | Try |
|---|---|
| Matching canisters | Reused glass jars with lids that still seal |
| Clear acrylic bins | Shoeboxes, cut-down cereal boxes or basic plastic baskets |
| Printed labels | Masking tape and a permanent marker |
| A spice drawer insert | A stepped riser or a small turntable |
| A tray divider | A tension rod set upright between two shelves |
| A new shelf unit | A wire shelf insert that splits one tall shelf into two |
Spend money only where a cheap option keeps failing. That is usually airtight containers for flour, sugar and rice, and one sturdy riser for cans.
Small-space tips
- Turn a cabinet into a pantry. If you don’t have a pantry, pick the cabinet nearest your prep space and give it a riser, two bins and a rack on the inside of the door for spice jars or wraps.
- Use the side of the fridge. A magnetic rack holds spices, wraps and paper towels without using a cabinet. Check your fridge manual first and keep any vents and the clearance it asks for clear.
- Add a small open shelf. A 2- or 3-tier wood shelf on the counter or in a corner holds jars of pasta, oats and coffee where you use them, and looks tidy because everything on it is in plain jars.
- Fit a slim cart into a gap. Rolling carts about 5 to 7 inches (13 to 18 cm) wide fit the gap beside a fridge or between a cabinet and the wall. Again, don’t block the fridge’s ventilation.
- Use a door. An over-the-door organizer on the pantry or a nearby closet door holds snacks, spice jars and small packets in clear pockets.
- Pick the right shelving for heavy food. If you’re adding a freestanding unit in a closet or hallway for canned goods and bulk bags, our comparison of wood and metal shelving weighs up load, moisture and looks. Whichever you choose, check the weight rating per shelf before loading it with cans.
Mistakes to avoid
- Buying matching containers first. They’re the most expensive part, and you don’t know which sizes you need until the zones are set up and you’ve lived with them for a couple of weeks.
- Decanting everything. Containers bigger than the packages you buy, or smaller than them, leave half-bags lying around. Decant only staples, in sizes that fit what you buy.
- Round containers on small shelves. Square and rectangular ones fit side by side and stack; round ones waste the corners.
- Deep shelves without bins. Anything in the back row is out of sight and gets bought again.
- Heavy things up high. Bulk bags and bottles are hard to lift down safely from a top shelf. Keep them low.
- Overbuying in bulk. A bulk deal only saves money if you have a place to store it and use it before the date.
Questions people ask
How can I organize my pantry for cheap?
Start with what you already have: reuse clean glass jars, shoeboxes and cut-down cereal boxes as bins, and label with masking tape and a marker. Group food into zones, put daily items at eye level and heavy ones low, then buy only what solves a measured problem. For most pantries that means a riser for cans and a few bins with handles for the deepest shelves.
What pantry foods should go in airtight containers?
Dry goods that go stale or attract pantry pests: flour, sugar, rice, oats, cereal, pasta, nuts and dry pet food. Airtight containers keep moisture out and stop moths and beetles moving from one package to the next. Cans, jars and bottles are already sealed and can stay in their own packaging. Cut the best-by date and cooking instructions off the bag and keep them with the container.
How do I organize a deep pantry shelf?
Treat it like a drawer. Put one category in a bin with a handle that is about as deep as the shelf, so you pull the whole bin forward instead of reaching over the front row. Use a stepped riser for cans so the back rows sit higher and stay visible, and a turntable in the corners. Keep the bins you use most at the front and at eye level.
How do I organize food in a kitchen with no pantry?
Choose one cabinet near where you prepare food and make it the pantry, with a shelf riser and a few bins. Then add storage outside the cabinets: a magnetic rack on the side of the fridge for spices, a slim rolling cart in a gap beside the fridge, an over-the-door organizer or a small open shelf for jars. Keep only what you use often in the kitchen and store backups in a closet.